When someone subscribes to your newsletter, downloads a resource, registers for an event, creates an account, or joins your customer community, the first email they receive can shape their expectations for every communication that follows.
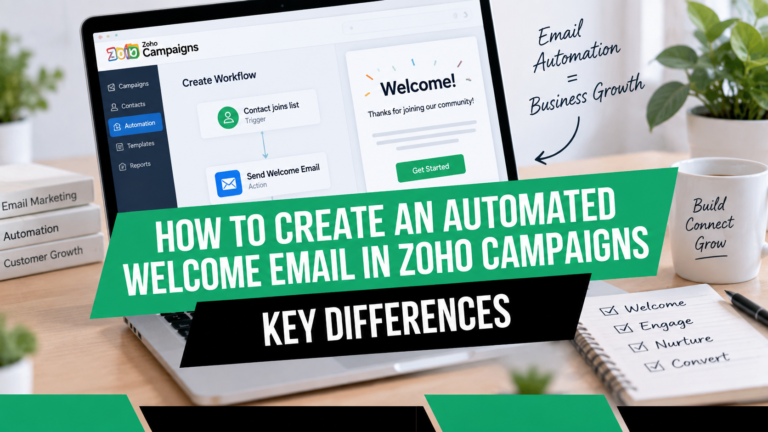
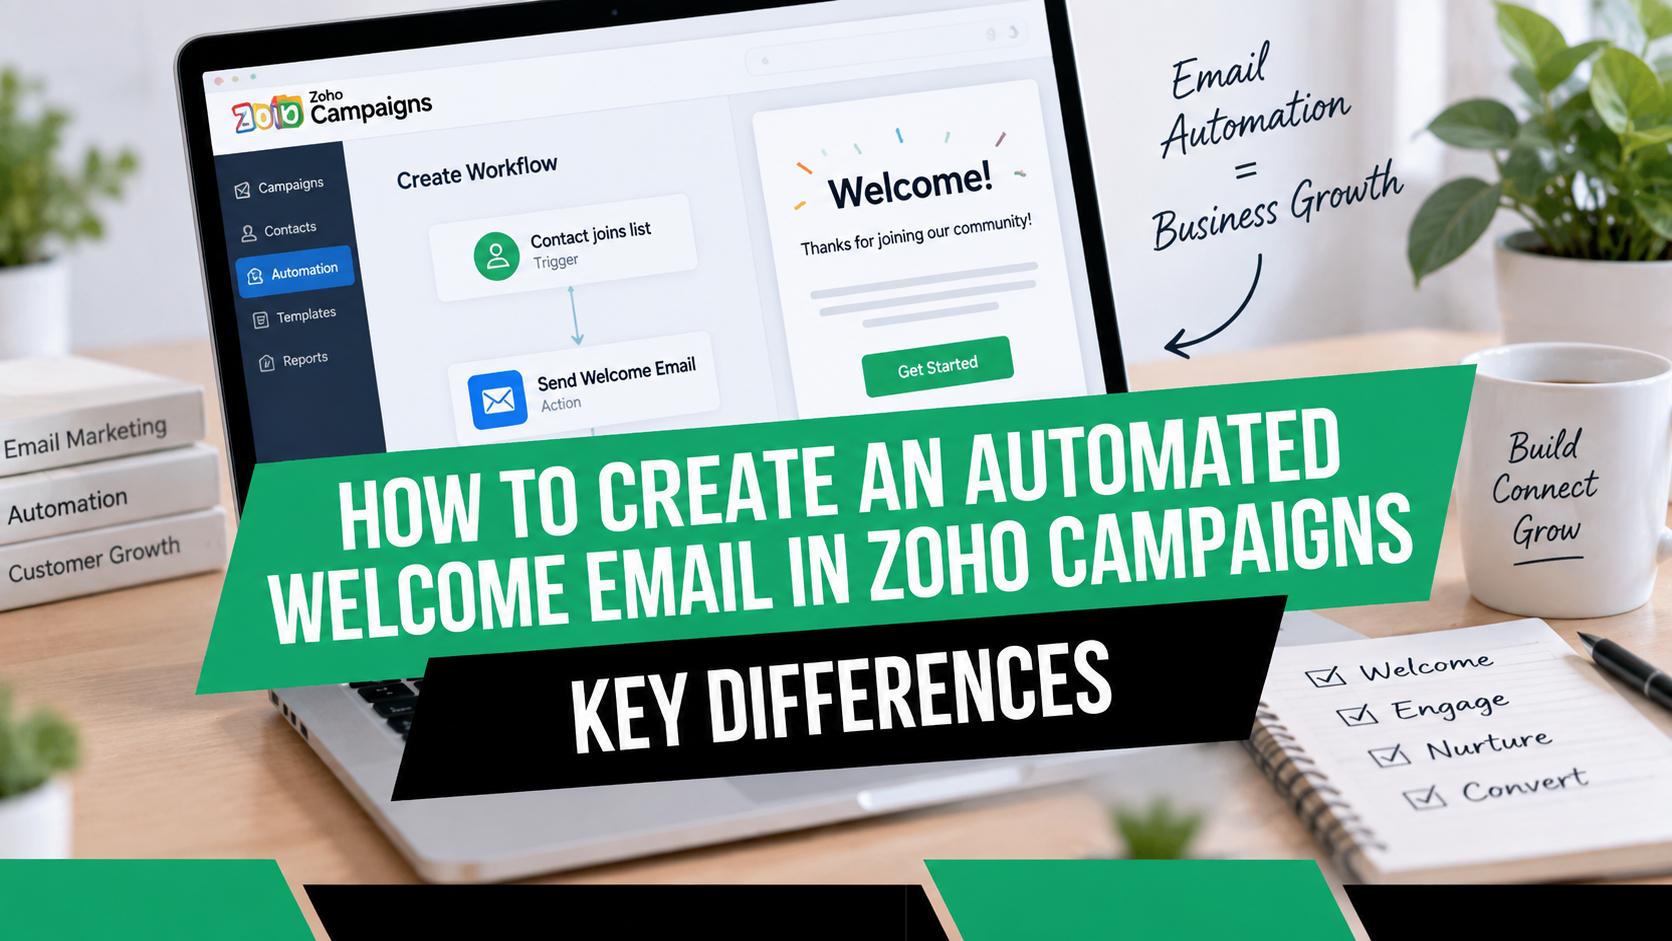
Instead of manually sending a welcome message every time someone joins your audience, you can automate the process with Zoho Campaigns.
An automated welcome email allows your business to respond to new subscribers at the right moment, introduce your brand, deliver promised resources, explain what subscribers can expect, and guide them toward the next step.
If you’re looking for an email marketing platform that combines campaigns, automation, segmentation, personalization, and analytics, you can explore Zoho Campaigns.
In this guide, you’ll learn how to create an automated welcome email in Zoho Campaigns, how to choose the right trigger, create the welcome email, add delays and follow-up messages, test the workflow, monitor performance, and turn a simple welcome message into a complete automated onboarding journey.
What Is an Automated Welcome Email?
An automated welcome email is a message that is sent automatically after a person performs a specific action, such as subscribing to your email list.
Instead of your marketing team manually identifying every new subscriber and sending a message, an automation handles the process.
For example:
Visitor submits signup form → Contact enters list → Welcome workflow starts → Welcome email is sent
This can happen without someone manually pressing the Send button for every new subscriber.
The automation can be as simple or sophisticated as you need.
A basic workflow might contain:
Trigger → Welcome Email
A more advanced onboarding workflow could look like:
Signup → Welcome Email → Wait 2 Days → Educational Email → Wait 3 Days → Product Information → Check Engagement → Personalized Follow-Up
This is where email marketing automation becomes particularly useful.
If you’d like to explore the platform before creating your workflow, get started with Zoho Campaigns.
Why Should You Automate Welcome Emails?
A welcome email is often one of the first meaningful communications between your business and a new subscriber.
Automation makes it possible to deliver that communication consistently.
Respond Immediately
A new subscriber does not have to wait until someone from your marketing team notices their signup.
An automated workflow can begin when the configured trigger occurs.
For example, if someone subscribes to your newsletter, your welcome email can be sent as part of the automated journey instead of requiring someone to manually monitor new subscribers.
Create a Consistent Customer Experience
Every contact entering the same workflow can receive the same core onboarding experience.
This is particularly useful for businesses that receive subscribers around the clock.
Whether someone subscribes on Monday morning or Saturday evening, the automated process can provide a consistent first interaction.
Save Marketing Time
Instead of manually sending repetitive emails, your team can create the workflow once and allow it to manage recurring communication.
This gives marketers more time to concentrate on strategy, content, campaigns, and customer relationships.
Deliver Resources Automatically
If your signup form promises something such as:
- An ebook
- Checklist
- Coupon
- Webinar information
- Free guide
- Product information
- Downloadable template
your welcome email can provide the appropriate next step.
Begin Lead Nurturing
The welcome email does not have to be the end of the journey.
It can be the first message in a longer automated sequence designed to educate, engage, and eventually convert subscribers.
How Does a Welcome Email Workflow Work in Zoho Campaigns?
The basic concept is straightforward.
A workflow contains a trigger, followed by actions and, when needed, conditions or delays.
For a simple welcome email, the structure could be:
Contact joins list → Send Welcome Email
Or:
Contact submits form → Add to Welcome Workflow → Send Welcome Email → Wait → Send Educational Email
For businesses that want to create automated email journeys without manually sending every message, Zoho Campaigns can be used as the central platform for building the workflow.
The important thing to remember is that automation starts with an event.
That event could be:
- A contact joining a list
- A signup form submission
- An email interaction
- A subscriber entering a segment
- A customer action
- Another configured trigger
Once the trigger occurs, the workflow performs the actions you have configured.
How to Create an Automated Welcome Email in Zoho Campaigns
Now let’s walk through the process step by step.
Step 1: Define the Goal of Your Welcome Email
Before opening the workflow builder, decide what the welcome email needs to accomplish.
A welcome email might have one of several goals.
Welcome New Subscribers
Simply thank the person for joining your email community.
Deliver a Lead Magnet
Give the subscriber access to the resource they requested.
Introduce Your Business
Explain who you are and what your company does.
Set Expectations
Tell subscribers:
- What type of emails they will receive
- How often they will receive them
- What topics you cover
- What value they can expect
Drive a Specific Action
You may want the subscriber to:
- Read an article
- Watch a video
- Book a meeting
- Start a trial
- Explore your website
- Use a discount
- Complete their profile
The best welcome emails usually have a clear primary objective.
Before creating the automation, you can explore Zoho Campaigns and determine how its email marketing capabilities fit your particular objective.
Step 2: Prepare Your Contact List
Your workflow needs an audience to work with.
In Zoho Campaigns, you can organize contacts into lists and use those lists as part of your automation strategy.
For example, you might have:
Newsletter Subscribers
Free Trial Users
Webinar Registrants
Ebook Downloaders
New Customers
This organization becomes particularly useful when you want different audiences to receive different welcome experiences.
Why List Organization Matters
Imagine that you have three signup forms:
Form A: Newsletter
Form B: Free Ebook
Form C: Product Demo
Sending the exact same welcome email to all three groups may not make sense.
Someone requesting an ebook may need an educational onboarding sequence.
Someone requesting a product demo may need information about your product and booking process.
Someone joining a newsletter may simply need an introduction to your content.
Creating a logical audience structure makes automation much more useful.
Step 3: Create or Connect Your Signup Form
A signup form is one of the most common ways to introduce contacts into a welcome workflow.
Your form might appear on:
- Your homepage
- Blog posts
- Landing pages
- Product pages
- Webinar pages
- Lead-generation pages
- Ecommerce pages
A simple newsletter form might ask for:
First Name
Email Address
You can collect additional information when there is a legitimate reason to do so, but shorter forms can reduce friction.
Once someone submits the form, the contact can enter the appropriate audience and potentially trigger the welcome workflow.
If you’re planning to build signup forms and automated campaigns together, get started with Zoho Campaigns.
Step 4: Create Your Welcome Email
Before building the automation, create the email that will be delivered to new subscribers.
A strong welcome email typically contains several elements.
Write a Clear Subject Line
Examples include:
- Welcome to [Brand Name]
- You’re In! Here’s What Happens Next
- Welcome — Your Free Guide Is Inside
- Thanks for Joining Us
- Welcome to Our Community
- Your Resource Is Ready
The subject line should accurately represent what is inside the email.
Avoid misleading subject lines simply to increase opens.
Use a Personal Greeting
If you collect the subscriber’s first name and configure personalization appropriately, you can create a more personalized introduction.
For example:
Hi Sarah,
rather than:
Dear Subscriber,
However, personalization should be useful rather than simply decorative.
Include a Thank-You Message
Tell the subscriber why you appreciate their signup.
For example:
Thanks for joining our email community. We’re excited to share practical resources, ideas, and updates with you.
Explain What Happens Next
Set expectations.
For example:
You’ll receive practical email marketing tips twice a month, along with occasional product updates and useful resources.
Provide the Promised Resource
If the person subscribed to download something, make the resource easy to access.
Include One Primary CTA
Examples include:
Download Your Guide
Explore the Tutorial
Start Your Free Trial
Book a Consultation
Read the Article
A focused CTA makes it easier for the subscriber to understand what to do next.
Step 5: Open Workflows in Zoho Campaigns
Once your welcome email is ready, move to the workflow automation area.
The objective is to create the sequence that determines:
When should the email be sent?
Who should receive it?
What should happen afterward?
You can explore Zoho Campaigns here before setting up your workflow.
For beginners, starting with a simple workflow is often easier than immediately building a complicated customer journey.
Step 6: Choose a Welcome and Onboarding Workflow
If you want to create a standard welcome sequence, choose the appropriate welcome or onboarding workflow option when available.
A pre-built workflow can provide a useful starting point because the basic automation structure is already established.
You can then customize:
- Audience
- Trigger
- Timing
- Conditions
- Follow-up actions
If the available workflow does not match your requirements, you can build your own workflow from scratch.
The objective is not to create the most complicated workflow possible.
The objective is to create a workflow that matches your customer journey.
Step 7: Choose the List Entry Trigger
One of the simplest ways to automate a welcome email is with a List Entry trigger.
The concept is:
A contact enters a specific list → The workflow begins
For example, suppose your list is called:
Newsletter Subscribers
Your workflow could be:
Trigger: Newsletter Subscribers list entry
↓
Action: Send Welcome Email
This is particularly useful when your newsletter signup process automatically adds subscribers to a specific list.
The result is a simple automated process:
Visitor subscribes → Contact joins list → Welcome email is sent
If you want to build this type of automated email marketing process, explore Zoho Campaigns.
Step 8: Use a Form Submission Trigger When Appropriate
Another option is to start the workflow when someone submits a particular form.
This can be useful when different forms have different purposes.
For example:
Product Demo Form → Product Demo Welcome Workflow
Ebook Form → Ebook Welcome Workflow
Newsletter Form → Newsletter Welcome Workflow
This approach gives you more control over the subscriber experience.
Imagine that someone downloads a guide called:
The Complete Small Business Email Marketing Checklist
The welcome email could immediately provide that checklist.
Meanwhile, someone who requests a product demonstration could receive a different welcome email explaining what happens next.
This is one reason it is useful to think about your automation strategy before building individual emails.
Step 9: Add the Send Email Action
Once your trigger is configured, add a Send Email action.
This is the action that actually delivers your welcome message.
Select the welcome campaign you created earlier.
Your basic workflow now looks like:
List Entry
↓
Send Welcome Email
That’s enough for a simple automated welcome email.
If you’re ready to create your first automated workflow, get started with Zoho Campaigns.
Step 10: Decide Whether the Welcome Email Should Be Immediate
For many welcome campaigns, immediate delivery makes sense.
If someone signs up for your newsletter at 10:00 AM, you may want the welcome message to arrive shortly afterward.
The longer you wait, the more disconnected the communication may feel.
However, not every welcome-related workflow needs to be immediate.
Consider the context.
If someone registers for a webinar:
Registration → Confirmation
may need to happen immediately.
But:
Registration → Educational Email
could potentially happen later.
The timing should therefore be based on the customer’s expectations and your marketing objective.
Step 11: Add a Wait Step for Follow-Up Emails
If you want to build a multi-email onboarding sequence, you can add a wait period after the welcome email.
For example:
Day 0: Welcome Email
Day 2: Helpful Resource
Day 5: Educational Email
Day 8: Product Introduction
Day 12: Next-Step CTA
A delay can prevent subscribers from receiving too many messages immediately.
The right interval depends on:
- Your audience
- Your content
- Your industry
- Subscriber expectations
- Campaign objective
Don’t add delays simply because you can.
Every message should have a purpose.
Step 12: Create a Complete Welcome Email Sequence
Instead of sending only one message, consider turning your welcome email into an onboarding journey.
Here’s an example.
Email 1: Welcome
Timing: Immediately
Purpose:
- Thank the subscriber
- Introduce the brand
- Deliver the promised resource
- Explain what happens next
Email 2: Educational Content
Timing: 2 days later
Purpose:
- Solve a problem
- Build trust
- Provide useful information
Email 3: Product or Service Introduction
Timing: 3 days later
Purpose:
- Explain how your solution works
- Connect it to the problem discussed previously
Email 4: Social Proof
Timing: 3 days later
Purpose:
- Introduce a customer story
- Show how others use your solution
Email 5: Next Step
Timing: 3–5 days later
Purpose:
- Invite the subscriber to take an appropriate action
This turns your welcome email into a lead-nurturing system rather than a one-time communication.
Step 13: Personalize Your Welcome Email
A welcome email does not have to feel generic.
You can personalize the message using available subscriber information.
For example:
Hi {{First Name}}, welcome to our community.
More meaningful personalization could connect the message to the subscriber’s action.
For example:
Hi {{First Name}}, since you downloaded our email marketing guide, here are three resources that can help you take the next step.
That is more useful than simply inserting a name.
If personalization and automated customer journeys are part of your email marketing strategy, explore Zoho Campaigns.
Step 14: Add a Clear Call to Action
Every welcome email should make the next step obvious.
Examples include:
Download the Guide
Start Your Free Trial
Explore Our Resources
Book a Demo
Read the Next Article
Complete Your Profile
Avoid giving the subscriber ten competing actions.
If your primary goal is to get someone to download a resource, make that the dominant CTA.
If the goal is onboarding, make the next onboarding action obvious.
Step 15: Test Your Welcome Email
Before activating the workflow, test everything.
Subject Line
Is it clear and accurate?
Sender Name
Will the recipient recognize who sent it?
Email Copy
Is it easy to understand?
CTA
Does the button go to the correct destination?
Personalization
Does the dynamic information display correctly?
Images
Do images load properly?
Mobile Design
Does the email remain readable on a smartphone?
Links
Do all links work?
Timing
Will contacts enter the workflow at the intended time?
Audience
Are the correct contacts entering the automation?
Testing is particularly important for automated campaigns because an error can continue affecting new contacts until the workflow is corrected or paused.
Step 16: Review the Workflow Before Launching
A useful workflow checklist is:
Trigger configured?
Correct list selected?
Correct form selected if applicable?
Welcome email selected?
Wait time configured?
Follow-up emails configured?
Conditions configured correctly?
Exit conditions considered?
Links tested?
Personalization checked?
Audience verified?
Workflow ready to launch?
Before activating your automation, review the complete customer journey from the subscriber’s perspective.
Ask:
If I were a new subscriber, would this sequence feel helpful, relevant, and easy to understand?
If the answer is yes, you’re closer to having a useful automation.
Step 17: Launch the Welcome Workflow
Once your workflow is ready, launch it.
Before doing so, make sure you’re comfortable with:
- The trigger
- The audience
- The email
- The timing
- The follow-up logic
Once active, monitor the workflow rather than assuming everything will work perfectly.
If you’re ready to put your welcome email automation into practice, get started with Zoho Campaigns.
How to Know Whether Your Automated Welcome Email Is Working
Automation is only useful when you measure its results.
Useful indicators can include:
- Deliveries
- Opens
- Clicks
- Unsubscribes
- Bounces
- Engagement
- Workflow contacts entered
- Workflow contacts exited
- Follow-up activity
The exact metrics you prioritize should depend on the objective of your welcome campaign.
For example, if your goal is to deliver a downloadable guide, clicks may be particularly important.
If your goal is to introduce a newsletter, engagement over the next several emails may provide more useful information.
What Should You Measure in a Welcome Email?
Delivery
Did the message reach the intended recipients?
A delivery problem may indicate issues with the contact database, sending configuration, or email addresses.
Open Activity
Are recipients opening the welcome message?
Use this information directionally rather than treating opens as a perfect measure of attention.
Click Activity
Clicks can provide stronger evidence that recipients interacted with your content.
For example, if your welcome email says:
Download Your Free Guide
you can examine whether subscribers clicked the download link.
Unsubscribes
A sudden increase in unsubscribes can be a signal that your message, frequency, targeting, or expectations need review.
Workflow Performance
Look at how many contacts enter and progress through your workflow.
If subscribers enter but many stop engaging later, investigate where that happens.
Best Practices for Creating Automated Welcome Emails
Creating an automation is relatively easy.
Creating a useful automation requires more thought.
1. Send the Welcome Email at the Right Time
For a straightforward subscription, an immediate welcome email can make sense.
2. Deliver What You Promised
If your signup form says:
Download Our Free Guide
the welcome email should make that resource easy to access.
3. Keep the First Email Focused
Do not overwhelm a new subscriber with everything your business offers.
Introduce the relationship gradually.
4. Set Expectations
Tell people what they can expect from you.
For example:
You’ll receive one practical email every Tuesday.
5. Provide Real Value
Don’t make the welcome email purely promotional.
Give the subscriber something useful.
6. Use One Primary CTA
Make the next step obvious.
7. Keep Emails Mobile-Friendly
Many people read emails on mobile devices, so make sure your layout, text, buttons, and images work well on smaller screens.
8. Avoid Excessive Automation
Automation should improve the subscriber experience.
If someone receives six emails in one day because multiple workflows are running simultaneously, the experience can become frustrating.
9. Segment Where Appropriate
A new customer and a new prospect may require different onboarding.
10. Review Your Automation Regularly
Your business changes.
Products change.
Links change.
Offers expire.
Your welcome workflow should be reviewed periodically.
Common Mistakes to Avoid With Automated Welcome Emails
Mistake 1: Sending a Generic “Thanks” Email
A simple thank-you is fine, but it may not provide enough value.
Use the opportunity to establish expectations and guide the subscriber.
Mistake 2: Making the Email Too Promotional
The first email should usually focus on establishing trust rather than immediately pushing a hard sale.
Mistake 3: Too Many CTAs
If everything is important, nothing is clear.
Mistake 4: Ignoring the Signup Source
Someone who requested an ebook has already told you something about their interests.
Use that context where appropriate.
Mistake 5: Sending the Same Sequence to Everyone
Different audiences may require different onboarding journeys.
Mistake 6: Forgetting to Test Links
A broken welcome-email link can create a poor first impression.
Mistake 7: Never Reviewing Performance
Automation does not mean “set it and forget it forever.”
Review performance and improve the sequence.
How to Create a Welcome Email Sequence for a Small Business
Let’s look at a practical example.
Imagine you run a digital marketing agency and someone downloads:
The Small Business Digital Marketing Checklist
Your automated sequence could look like this.
Email 1 — Immediately
Subject: Your Digital Marketing Checklist Is Here
Content:
- Thank the subscriber
- Provide the checklist
- Introduce the agency
- Explain what they can expect
Email 2 — Day 2
Subject: The 5 Digital Marketing Mistakes Small Businesses Make
Content:
- Provide educational value
- Explain common problems
- Link to a detailed article
Email 3 — Day 5
Subject: How to Build a Simple Marketing Funnel
Content:
- Teach a practical strategy
- Introduce your methodology
Email 4 — Day 8
Subject: How We Help Small Businesses Grow Online
Content:
- Explain your service
- Include relevant proof
- Keep the CTA simple
Email 5 — Day 12
Subject: Want Help With Your Marketing Strategy?
Content:
- Invite the subscriber to book a consultation
The entire journey can run automatically after the initial signup.
If you want to build this type of automated nurture sequence, explore Zoho Campaigns.
How to Create a Welcome Workflow for an Ecommerce Business
Ecommerce businesses can use a different approach.
Email 1 — Immediately
Welcome the customer or subscriber.
Email 2 — Day 2
Introduce popular products or helpful content.
Email 3 — Day 5
Provide product education.
Email 4 — Based on Behavior
Recommend relevant products based on activity or purchase information where supported by your business data and integrations.
Email 5 — Later
Request feedback or encourage another relevant purchase.
The important principle is to make the automation relevant to the customer’s relationship with your business.
How to Create a Welcome Workflow for a SaaS Business
A software company can use onboarding automation differently.
For example:
Signup
↓
Welcome Email
↓
Product Setup Guide
↓
Feature Education
↓
Usage Check
↓
Advanced Feature Guide
↓
Upgrade or Sales CTA
This approach helps move beyond simply saying:
“Thanks for signing up.”
Instead, every email contributes to the user’s understanding of the product.
If you’re planning to build automated onboarding campaigns, get started with Zoho Campaigns.
How to Use Zoho Campaigns for Welcome Email Lead Nurturing
A welcome email can be the first stage of a larger lead-nurturing strategy.
Consider this funnel:
Website Visitor
↓
Signup
↓
Welcome Email
↓
Educational Content
↓
Engagement
↓
Product Information
↓
Case Study
↓
Offer
↓
Sales Conversation
For example, someone who clicks your product information email could receive a different follow-up from someone who has not engaged with your previous emails.
This is where marketing automation becomes significantly more powerful than simply scheduling newsletters.
How to Improve Your Automated Welcome Email Over Time
Your first version does not need to be perfect.
Start with a simple workflow.
Then improve it using actual campaign data.
Version 1
Signup → Welcome Email
Version 2
Signup → Welcome Email → Educational Email
Version 3
Signup → Welcome → Education → Product Introduction
Version 4
Signup → Welcome → Education → Engagement Check → Different Follow-Up
Version 5
Signup → Personalized Onboarding Journey Based on Subscriber Behavior
This incremental approach makes automation easier to manage.
Can Zoho Campaigns Personalize Automated Welcome Emails?
Yes, personalization can be incorporated into automated email campaigns.
For example, your welcome message could include the subscriber’s name.
More advanced personalization can use additional subscriber information to make the message more relevant.
However, personalization should always serve a purpose.
Useful personalization:
Welcome, John. Since you downloaded our CRM guide, here are three resources related to customer management.
Weak personalization:
Welcome, John!!! We know your name!!!
The first example provides relevant context.
The second simply inserts a name.
If personalized email automation is part of your strategy, explore Zoho Campaigns.
Can You Create a Welcome Email Without Building a Workflow From Scratch?
Yes.
For marketers who are new to automation, starting with an existing welcome or onboarding workflow can make the process easier.
You can then customize the workflow according to your business.
For example, you can adjust:
- Trigger
- Audience
- Wait time
- Conditions
- Follow-up actions
If the template does not fit your business process, you can create a workflow from scratch.
The important thing is to make the automation match your customer journey.
How to Choose Between List Entry and Form Submission
Both triggers can be useful, but the choice depends on your workflow.
Use List Entry When:
You want the automation to begin when contacts enter a specific mailing list.
Example:
Newsletter List → Welcome Sequence
Use Form Submission When:
You want a specific form to initiate the workflow.
Example:
Product Demo Form → Demo Onboarding
Use Behavior-Based Triggers When:
You need more sophisticated automation.
For example:
Email Clicked → Send Follow-Up
This can create a more responsive customer journey.
How Much Does Zoho Campaigns Cost for Automated Welcome Emails?
Zoho Campaigns offers different plans designed for different business requirements.
When choosing a plan, consider:
- Number of contacts
- Email volume
- Required workflow capabilities
- Segmentation requirements
- Personalization requirements
- Ecommerce requirements
- Analytics requirements
- Integration requirements
Rather than selecting a plan based only on price, identify the features your welcome automation actually requires.
Because software plans and feature availability can change, check the current offering when you are ready to make a purchasing decision.
Explore Zoho Campaigns to see whether the platform fits your email marketing requirements.
How to Get Started With Zoho Campaigns
If you want to automate your welcome emails, the basic process is:
1. Create your Zoho Campaigns account
2. Organize your contact list
3. Create your signup form or connect your existing contact source
4. Create your welcome email
5. Open Workflows
6. Choose a Welcome and Onboarding template or start from scratch
7. Select List Entry or Form Submission as your trigger
8. Add the Send Email action
9. Select your welcome email
10. Add delays and follow-up emails if needed
11. Test the workflow
12. Launch the automation
13. Monitor performance
14. Improve the sequence based on results
The important thing is to start simple.
You do not need a 15-email automation on day one.
A single well-written welcome email can provide the foundation for a much more sophisticated customer journey later.
Ready to Automate Your Welcome Emails With Zoho Campaigns?
If you’re ready to explore Zoho Campaigns and create automated email workflows for your subscribers, you can get started here:
Get Started With Zoho Campaigns
Affiliate Disclosure: This article contains an affiliate link. If you make a qualifying purchase through the link, the publisher may receive a commission at no additional cost to you.
Frequently Asked Questions About Automated Welcome Emails in Zoho Campaigns
What is an automated welcome email?
An automated welcome email is a message that is automatically sent after a subscriber performs a defined action, such as joining an email list or submitting a signup form. It can introduce your business, deliver a promised resource, set expectations, and guide the subscriber toward the next step.
How do I create an automated welcome email in Zoho Campaigns?
Create your welcome email, open the Workflows section, choose a welcome or onboarding workflow or create one from scratch, select an appropriate trigger such as List Entry or Form Submission, add a Send Email action, select your welcome campaign, test the workflow, and launch it.
What trigger should I use for a welcome email?
List Entry is useful when you want contacts to enter the welcome workflow when they join a particular mailing list. Form Submission is useful when you want a specific signup form to start the automation.
Can Zoho Campaigns send a welcome email immediately after signup?
Yes. You can configure the workflow so that the Send Email action follows the signup trigger without an intentional wait period.
Can I send multiple welcome emails?
Yes. A welcome campaign can become a multi-email onboarding sequence with multiple messages, delays, conditions, and follow-up actions.
Can I personalize my automated welcome email?
Yes. You can use available contact information to personalize automated messages. Personalization can include subscriber information and other relevant data available to your campaign.
Can I automate welcome emails after a form submission?
Yes. A form submission can be used as a trigger for a welcome workflow when configured appropriately.
Can I use Zoho Campaigns for lead nurturing after the welcome email?
Yes. A welcome email can be the first step in a longer lead-nurturing sequence involving educational content, product information, engagement checks, and conversion-oriented follow-ups.
Can I add a delay between welcome emails?
Yes. You can structure a workflow so that subscribers receive messages at different intervals rather than receiving every email immediately.
Can I track how my welcome workflow performs?
Yes. You can monitor campaign engagement and workflow activity to understand how subscribers interact with your automated sequence.
Is Zoho Campaigns suitable for small businesses?
Zoho Campaigns can be used by small businesses for newsletters, welcome emails, lead nurturing, segmentation, automation, and customer engagement. The appropriate plan depends on the business’s contact volume and required features.
Final Thoughts
A welcome email may be only one message, but it can become the starting point for an entire automated customer journey.
With Zoho Campaigns, you can begin with something simple:
New Subscriber → Welcome Email
Then gradually build a more sophisticated system:
New Subscriber → Welcome Email → Educational Content → Engagement Check → Personalized Follow-Up → Product Information → Conversion
The key is to focus on the subscriber experience.
Don’t automate simply because automation is available.
Automate the repetitive parts of communication while keeping the content useful, relevant, and aligned with what the subscriber expected when they signed up.
Start with one audience, one objective, and one welcome email.
Measure the results.
Then improve the workflow.
That approach can turn a basic signup notification into a structured email marketing automation strategy that works continuously in the background.
Ready to create your automated welcome email?
Get Started With Zoho Campaigns
Affiliate Disclosure: This article contains an affiliate link. If you make a qualifying purchase through the link, the publisher may receive a commission at no additional cost to you.
About the Author